In popular culture, bats have always been associated with evil. They not only symbolize evil spirits and vampires but are often considered harbingers of death. With Halloween at our doorstep, it is almost impossible to not think of using Bat DIYs to adorn our house. Having said that, we bring to you the 10 DIY Halloween bat decorations that are easy to make at home and will save you plenty of money.
DIY Halloween Bat Wreath

Decorating your home with cute wreaths has become essential in the recent past. We have already introduced you to witch wreath ideas for Halloween décor but you can also fancy a bat wreath as an alternative. A bat wreath not only adds décor to your interior decoration but is simple to make.
This interesting bat wreath we’d be talking about today can be crafted in a span of ten to fifteen minutes. All you require is paper, an embroidery hoop, scissors, and some paintbrushes. In case you want to make sure your wreath lasts long, try substituting paper with vinyl or leather. As far as the DIY process is concerned, you need to paint the embroidery hoop black, trace bats on paper, and carve them out to place onto the hoop.
Tutorial: Homecrux
DIY Halloween Bat Decorations for the Wall

In case you are not willing to have a wreath and want to clad the entire wall instead of just one portion, try this DIY bat wall décor DIYed by Homecrux. These superbly crafted bats not only look fancy on your entrance wall but also add a tinge of horror to your Halloween party.
To make these little DIY spooky bats, you would need black card stock, a scissor, and dual-sided mounting tape. These bats on the wall become an instant attraction for your guests. Moving to the DIY process, all you need to do is cut the desired number of bats using the bat template on paper. The next step involves you to bend their wings and applying them to the wall using double-sided tape. Once Halloween is over, you can easily take them out without leaving an impression on the walls.
Tutorial: Homecrux
DIY Trash Bag Bats
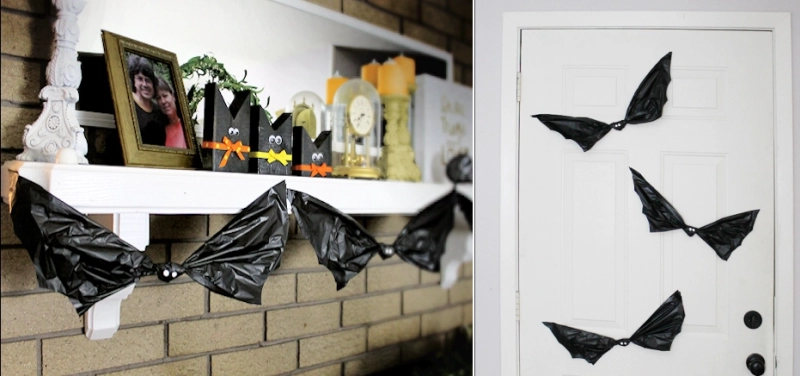
Who would have thought that trash bags could be productive in a number of ways rather than just being used in a waste bin? A large trash bag can make a full-sized bat. Thanks to the black color of these dumpsters, they easily transform into blood-sucking monsters. All one needs to do is fold the trash bags into desirable bat shapes and paint eyes to spook up children. These trash bag bats can be placed on the entrance, kitchen or anywhere else you prefer.
Tutorial: Craft Your Happiness
DIY Bat Garland for Halloween

Halloween garlands have always fascinated kids and DIY bat garland will be a great addition to your Halloween house party. To make such DIY bat garlands, you would require black card stock, tape, jute rope alongside other accessories. This garland could very well feature in your kid’s room and can be used at the entrance as well.
Tutorial: Homecrux
DIY Halloween Tree With Bats

Lest you have not planned on buying a Halloween tree, you can try this DIY tabletop tree project and save hundreds of dollars. It can feature at your entry or can be a perfect addition to your balcony too. It would hardly take you twenty minutes to assemble such a bat Halloween tree. You will need a handful of thin branches, bat cutouts, a glue stick, and a vase to poise the branches on.
Tutorial: Homecrux
Also Read: Best Halloween Mason Jar Crafts: 20 Ideas for DIY Enthusiasts to try
DIY Bats Flying Across a Pumpkin
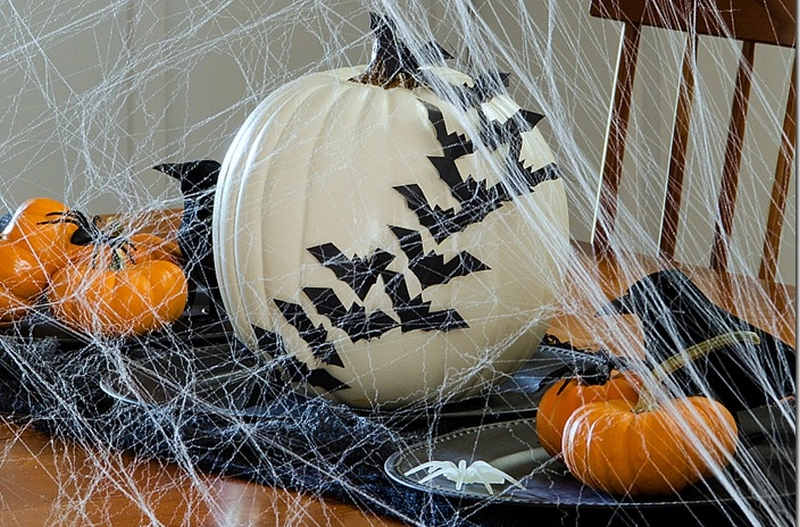
When we have introduced you to bat-themed garlands, trees, and wreaths, it will be a sin to leave pumpkins out. With this in mind, you can make your own decorative pumpkin with flying bat cutouts. Keep handy a black poster board that is requisite in making this creepy Halloween display. These bat cutouts easily stick to your faux pumpkin. The art could very well feature in your dining room or hallway.
Tutorial: It All Started With Paint
DIY Toilet Paper Tube Bats

A washroom is the last place where we expect the spookiness to creep under the skin. But this Halloween decoration by Homecrux is made up of upcycled toilet paper tubes and can be displayed in the living room as effectively as in the bathroom. Banish the ghost of the past by making these bats from black paper, toilet paper tubes, and some additional assistance from scissors and hot glue.
Tutorial: Homecrux
DIY Wooden Halloween Bats
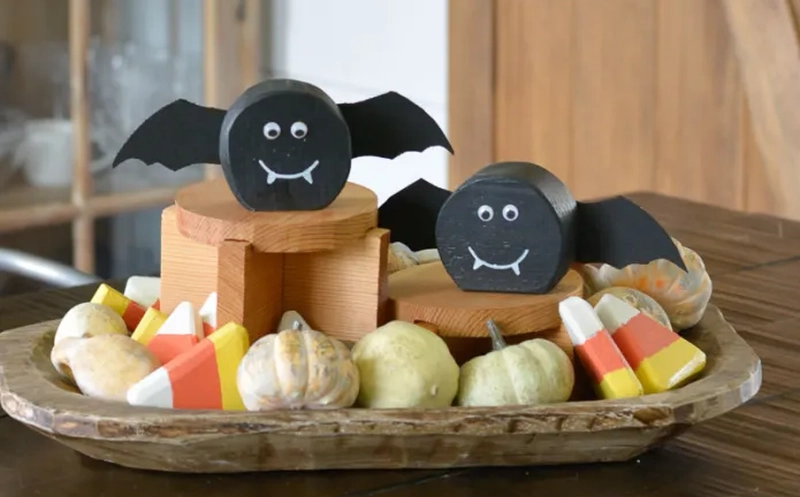
Made up of wood and painted black, this DIY Halloween bat decoration could easily feature in your dining space. Two razor-sharp teeth and button eyes make it look cute and spooky at the same time. For the DIY process, you would require lumber, a paint pen, a glue stick, and other accessories to give shape to this beautiful Halloween décor. Now the question arises how do you make wooden bat décor for Halloween? Well, you need to trace the bat bodies on wood, paint them black, and cut them precisely.
Tutorial: Farm Life DIY
DIY Halloween Bat Mobile
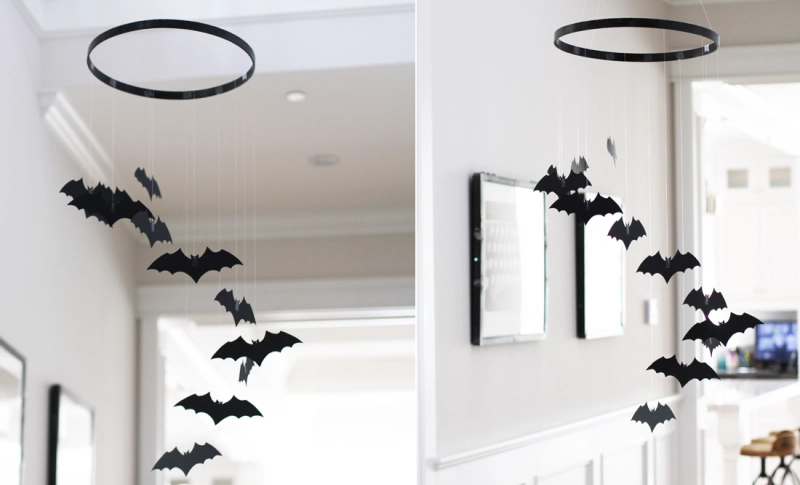
Before you confuse Bat Mobile with a mobile phone or the Dark Knight’s ride, we would like to mention that this DIY décor for Halloween has nothing to do with your smartphone or a Batmobile. The bat mobile is basically a decorative structure that can be suspended in the air to rotate freely. These wickedly easy-to-make bat mobiles can be made by tracing bats on black construction paper. Hang these awesome bats you’ve cut out in your living or bedroom and unfurl the spookiness.
Tutorial: Jessie Daye
DIY Bat String Light
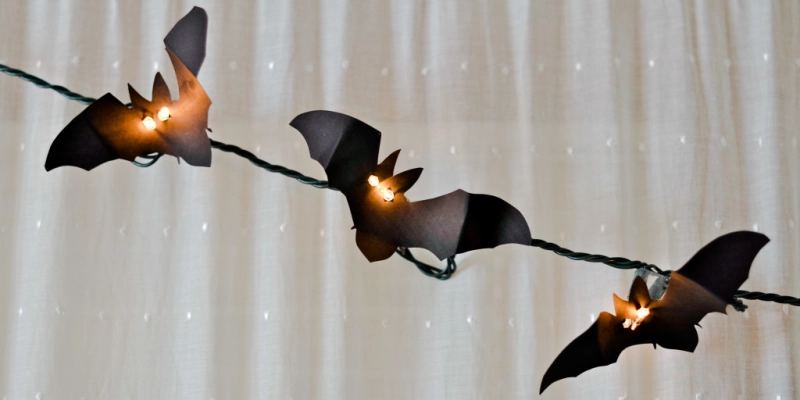
Just in case you want to decorate your house and light it up at the same time we have got you covered with a bat string light. All you require is white card stock, a bat template, and a string light and give your home a retro feel. With the bat garland light shining bright in your kitchen it will surely make your neighbors feel a little jealous. Just like any other DIY bat decoration, all you need to do is print bat templates and cut out those bat shapes to insert bat lights into it.
Tutorial: Bright Women
DIY Halloween Bat Lantern

For this fun and easy DIY you can recycle any empty milk carton. You also need scissor, paint, and tissue in any color of your choice. Start by cutting the top part of the carton, then cut out the bat’s eyes and belly. Now paint the outside of the bat in black, cut out wings, teeth, ears, and pupils out of a black card stock. Glue everything together, add wings and put your bat over a battery-operated tea light for a goofy and scary effect.
Tutorial: Anne Pike
DIY Halloween Leaf Bats

Get ready to charm the onlookers with this super easy and creepy bat leaf’s DIY. Start by spray painting any old frame in black. Then paint fake leaves resembling bat in dark great color. Once the paint is dried, cut and shape the leaf to create bat ears. For the last step, you need to paint menacing eyes and fangs with white paint. When everything is done, just attach the bats to the frame for a delightful and budget-friendly addition to your Halloween decorations. Display skulls and pumpkin for a frightening look.
Tutorial: Hometalk
DIY Bat Branch Halloween Centerpiece

You can use a store-brought branch and print some bat templates. Cut the templates out with the help of a scissor. Now use a pencil and trace a bat template onto black construction paper. When you have the bunch of wings cut out, just crease them in the canter to make them look like they are mid-flight. For the last step, attach the bats on a branch with a tape. This chic bat DIY is going to spruce up your Halloween dinner party.
Tutorial: hunker
DIY Spooky Bat Lantern for Halloween

For this DIY, you need a bunch of paper lanterns that you can buy from any online store or from your local store and some bat cuttings out of a paper. The following steps are simple, just take a lamp, cut out a bunch of bat templates and stick them on the lantern with the help of a glue or a hot glue gun and your Halloween bat lantern is complete. If you are hosting a party, they are perfect to bring an element of festivity.
Tutorial: diyncrafts
DIY Foam Pumpkin Bat

Decorate your home for Halloween with this effortless bat DIY. Gather foam pumpkins, scissor, paints, glitter vinyl, and some googly eyes to complement your spooky décor. Take foam pumpkins, paint them black and let the paint dry. Once your paint is dried completely, you need to cut out a pair of wings and ears using glitter vinyl.
For the next step, cut craft sticks in half and glue them behind the bat ears and wings so that you can easily stick them inside the foam by cutting pilot holes. Once you have all the cuttings you need, it is time to assemble the bat. Insert the sticks into the holes and add some glue to secure the sticks. Attach the bat wings and ears, stick googly eyes on the pumpkin, and ta-da! Your silly pumpkin bat DIY is all set to cast a charming spell on your visitors.
Tutorial: sheknows
Follow Homecrux on Google News!

