Halloween is here! If you are still looking for creepy finishes and Halloween decorations for your home, this is the right place to be. We can understand that it is difficult to find time for DIY crafts between busy work schedules and unavoidable household chores. But if you have an hour to spare, we have some amazing last-minute decoration ideas you can make. To suggest DIY decoration ideas, we’ve compiled a list of 50+ frighteningly festive, last-minute Halloween decorations for a perfect party. Have a look below:
Maleficent Wreath
Our in-house team made this Maleficent wreath for Halloween – an easy DIY project that adds a touch of dark magic to any space. The project starts with gluing black fabric to half of a foam wreath base and adding a festive ribbon. Then, Maleficent’s horns and her crow Diaval are created from glitter paper. The final task is to assemble them onto a wreath.

Yarn Pumpkin Garland
Create your own balloon pumpkin garland in minutes with us. First, cut the balloon neck, stuff it with cotton, tie it with a golden string for pumpkin ribs, shape a stem with the string, and add green floral tape for the finish. See the full tutorial for help.

DIY Paper Bat Wreath
It’s a simple DIY you can complete in a few hours. Start by crafting bats from folded black paper and then make a base wreath using two cardboard circles. You will need to bend protruding wires in various directions to attach bats. Once covered, your homemade paper bat wreath is ready to adorn your home with a touch of Halloween.

Paper Pumpkin Garland
You can create a Paper Pumpkin Garland in just a few simple steps. Start by cutting circular paper into petal shapes, threading them onto twine, and adding tendrils and leaves to make it a cute Halloween decoration.

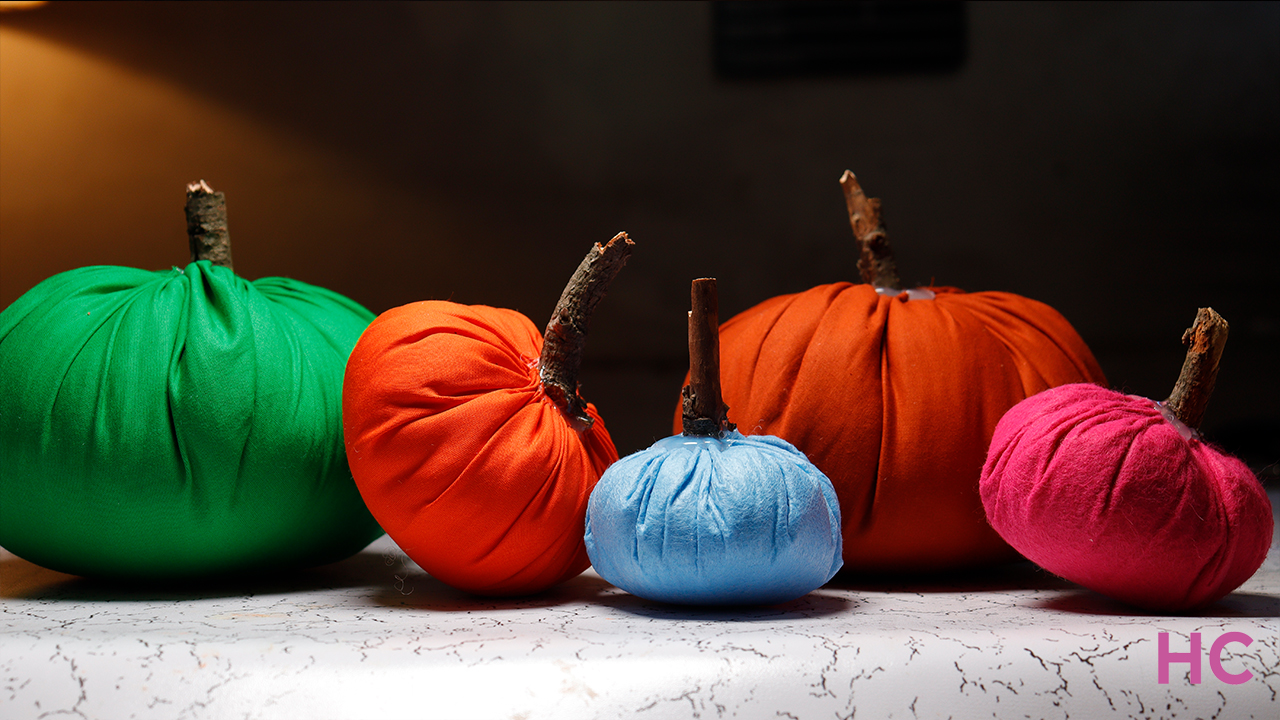
Fabric Pumpkins
Creating fabric pumpkins is quick and budget-friendly as well as perfect for fall, Halloween, or Thanksgiving. Sew a round piece of fabric into a sack, stuff it with cotton, and add a stem. These DIY pumpkins bring colorful charm to your decor.
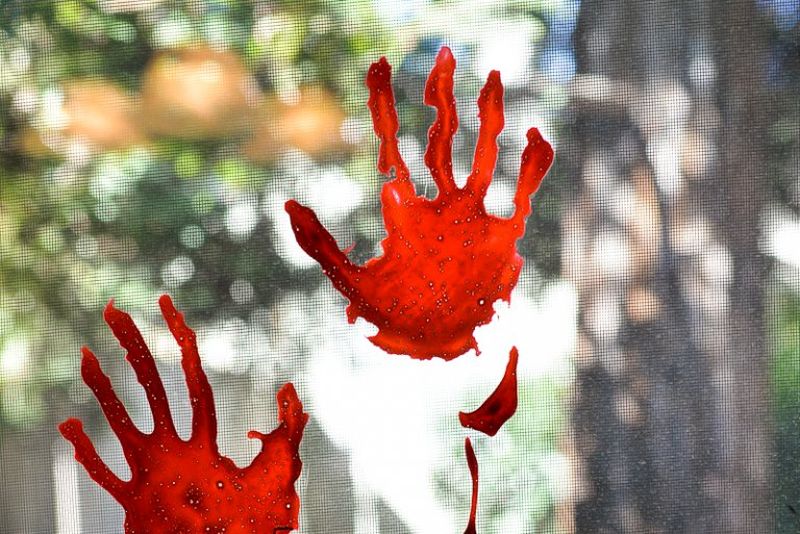
Bloody Handprint Window Clings
How about bloody handprints on walls and windows for Halloween decorations? You can easily make them using craft glue and food coloring. The bleeding handprint can be removed effortlessly using a spatula or scraper.
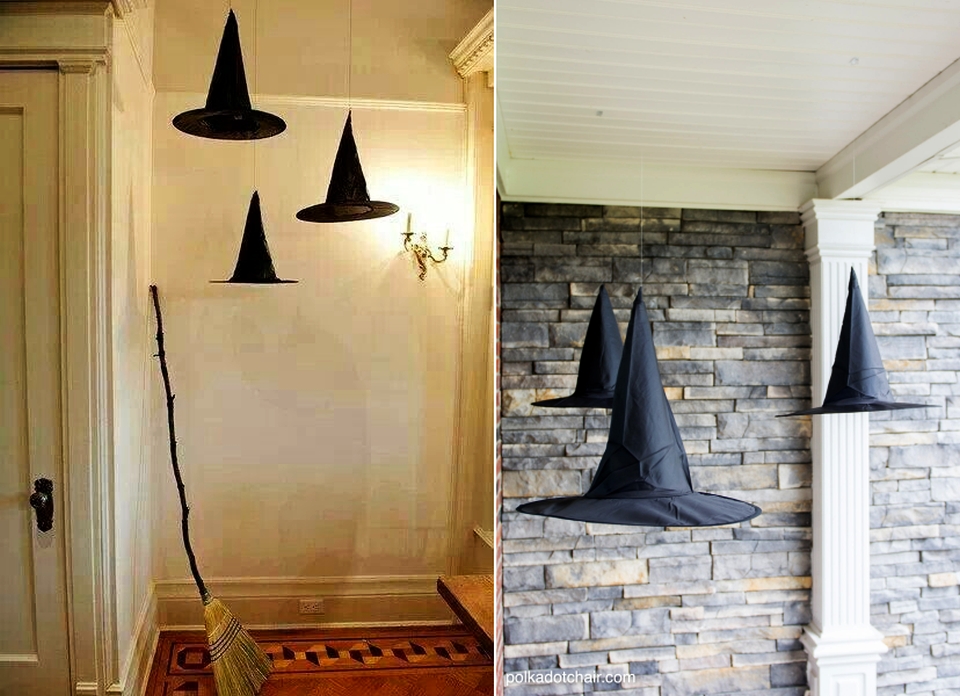
Floating Witch Hats
Using black paper, you can create as many witch hats as you want and hang them onto your ceiling with a thread. Place a rustic broom against the nearby wall to intensify the effect. This way, you’ll be able to create a minimalist yet eerie entryway or living room. These hanging witch hats will look great at the front door.
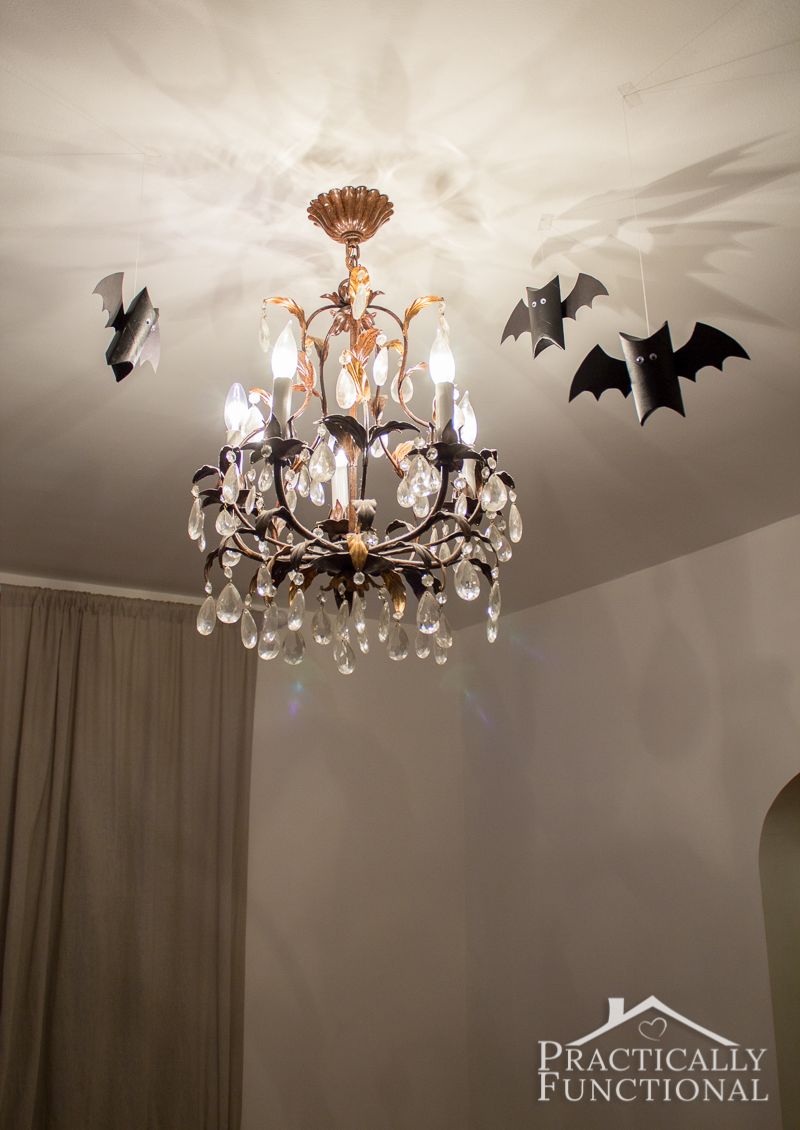
Toilet Paper Roll Bats
If you like toilet paper roll crafts, you can easily make cute bat decorations with them. Use black paper to cover the roll and decorate it with googly eyes and paper wings. Hang them anywhere around your home or turn them into treat boxes.
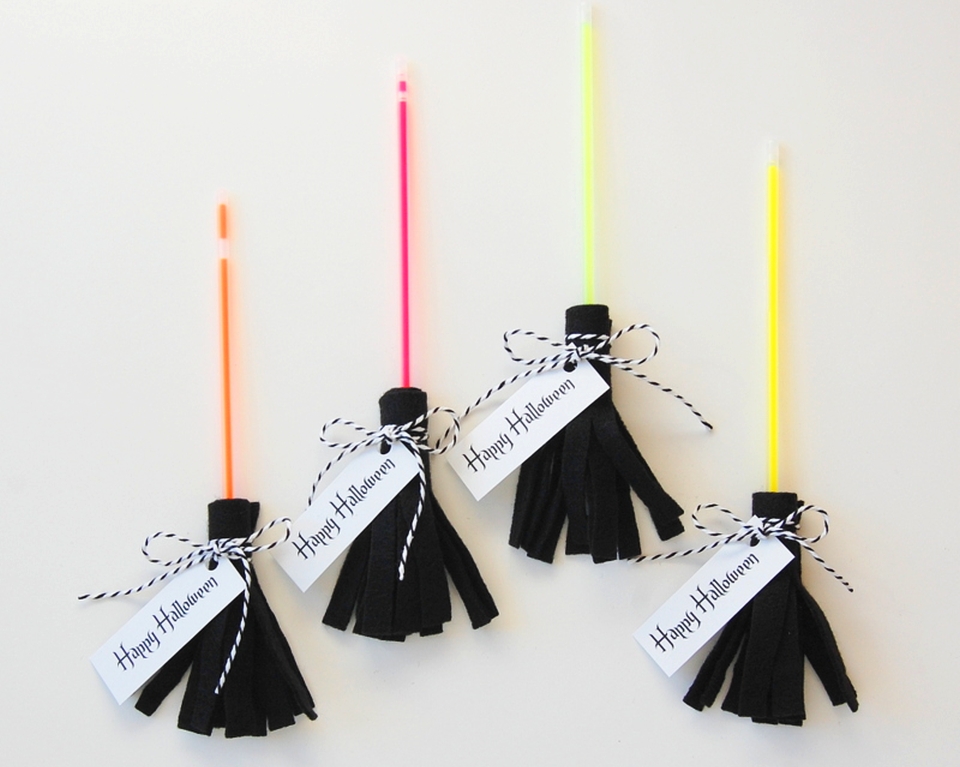
Glow Stick Brooms
You’ll need glow stick bracelets, black paper, and glue to create these fancy glowing brooms. Cut vertical stripes on rectangular pieces of paper, fold them onto the glow stick bracelet like a broom and your DIY glow stick brooms are ready to be hung on the wall.
Halloween Cup Decorations
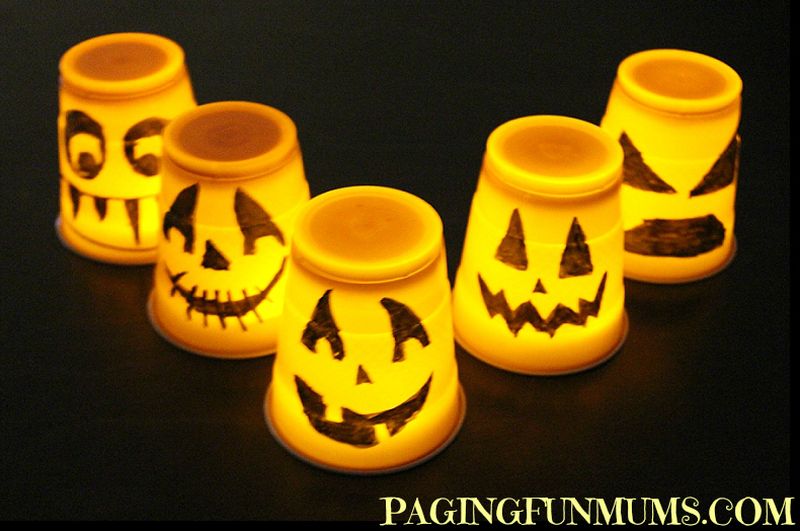
This is one of the easiest Halloween decoration ideas you can try along with your kids. All you have to do is paint creepy faces on orange plastic cups with a permanent marker and place a light underneath. These lighted cups are one-time-use DIY decorations.
Balloon Decoration
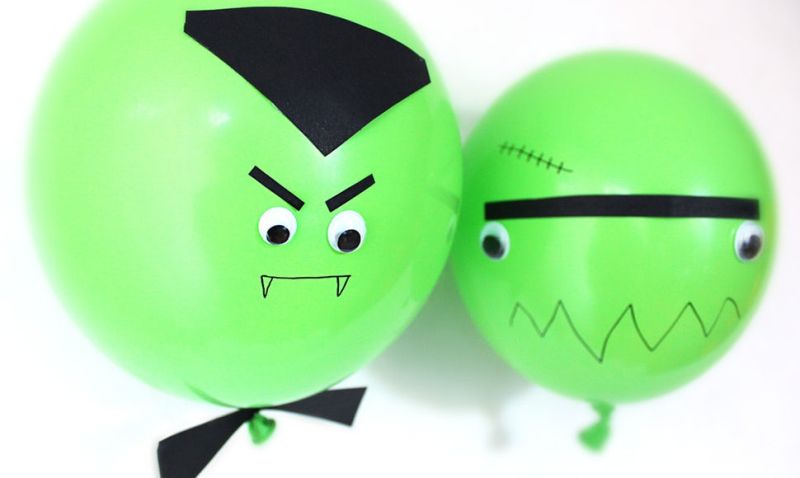
You can easily create ghosts, monsters, pumpkins, and other classic Halloween figures using balloons, paper, and a permanent marker. These balloon Halloween decorations can be hung using a ribbon or string as a garland.
Halloween Chalkboard Signs
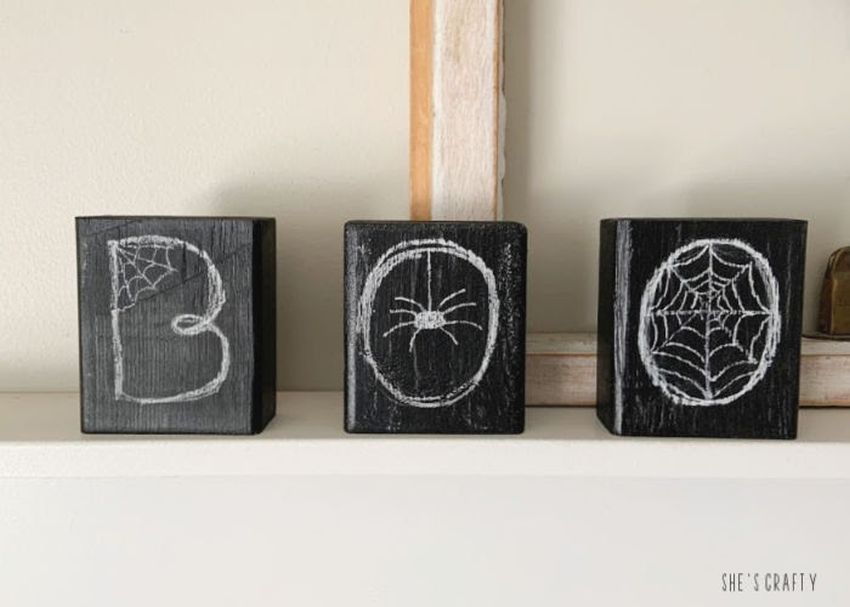
This is a super easy DIY Halloween project. Get some wood blocks, paint them with chalkboard paint, and make desired designs using chalk. These Halloween chalkboard blocks will look great inside or outside your home.
Also Read: DIY Halloween Wreath Ideas
Trash Bag Spiders
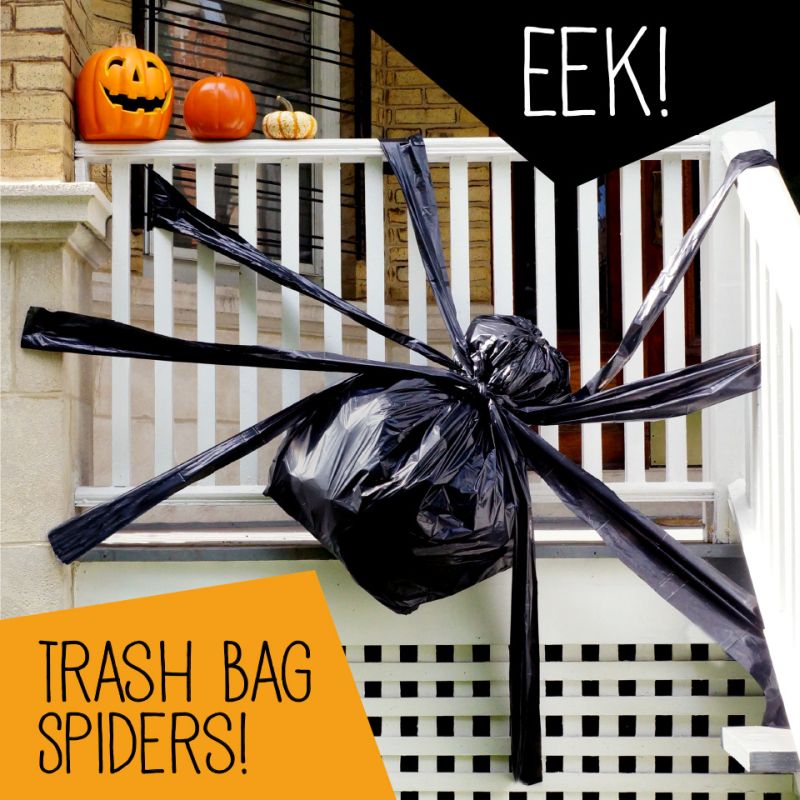
Trash bags can also be used in Halloween home décor. You can easily turn trash bags into creepy spider decorations. Just fill one with paper or leaves, make legs from thin plastic stripes, and place it wherever you want!
Spider’s Lair
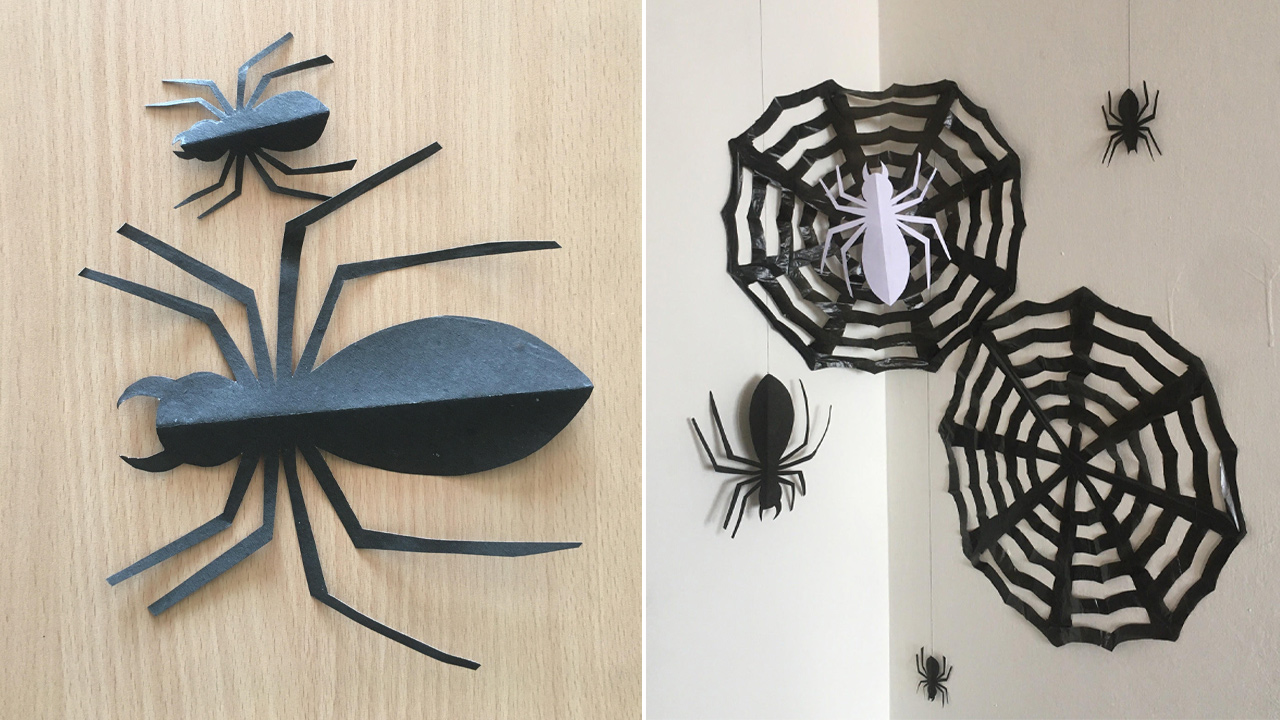
You can create a spider web out of black garbage bags. Just trace a spider web pattern on the garbage bag and then cut it out. Stick it to the wall using tape. This one will require some precision for sure, but the results are so satisfying.
Hot Glue Spider Web
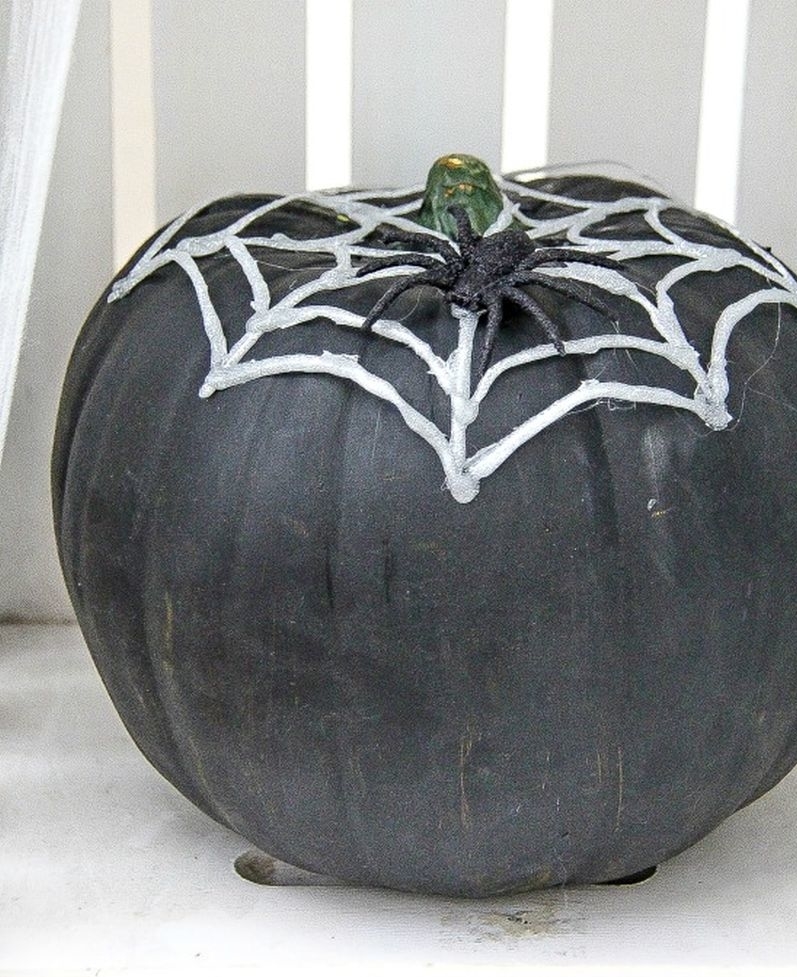
You can make a spider web Halloween decoration easily using a hot glue gun. Just draw a spider web pattern on a wax paper using the hot glue gun, let it dry and you are done. It will look great over a black-painted pumpkin.
Spider Lantern
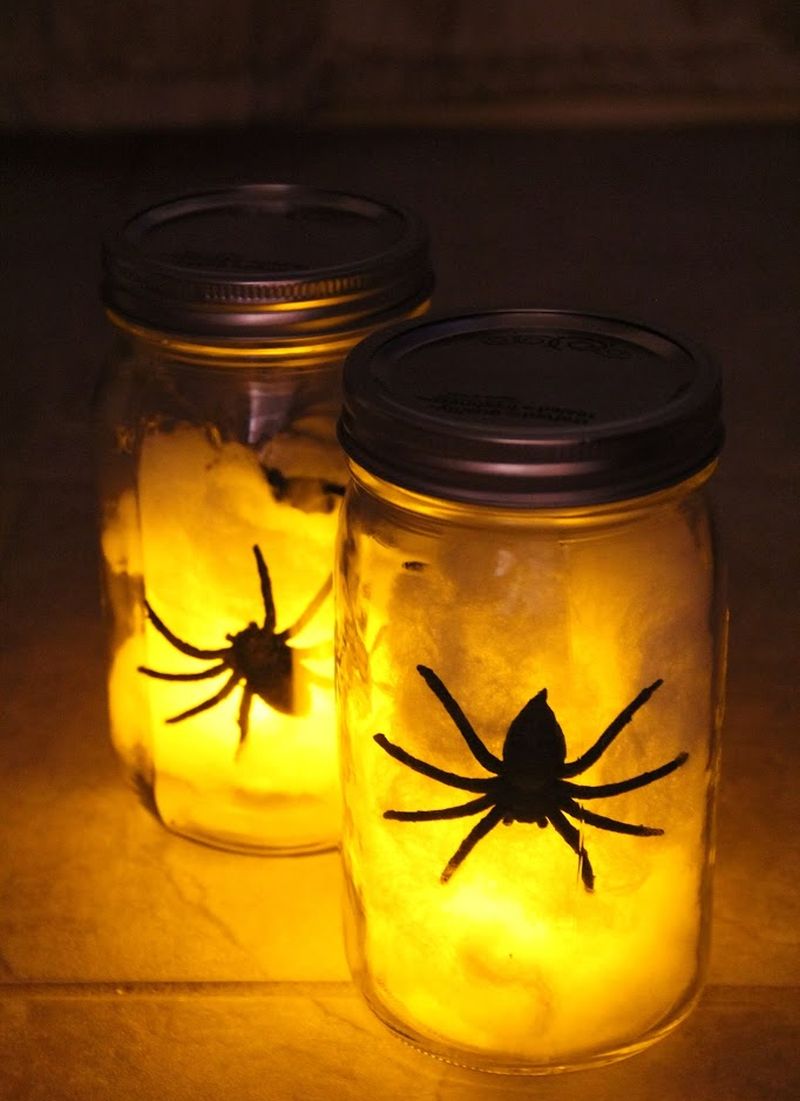
Take a leftover mason jar and fill it with cotton or fake spider web material, along with a fake spider and battery-operated light. Just three simple steps will make up this creepy spider lantern you’ll love.
Also Read: DIY Outdoor Halloween Decorations
Creepy Glow-in-the-Dark Staircase
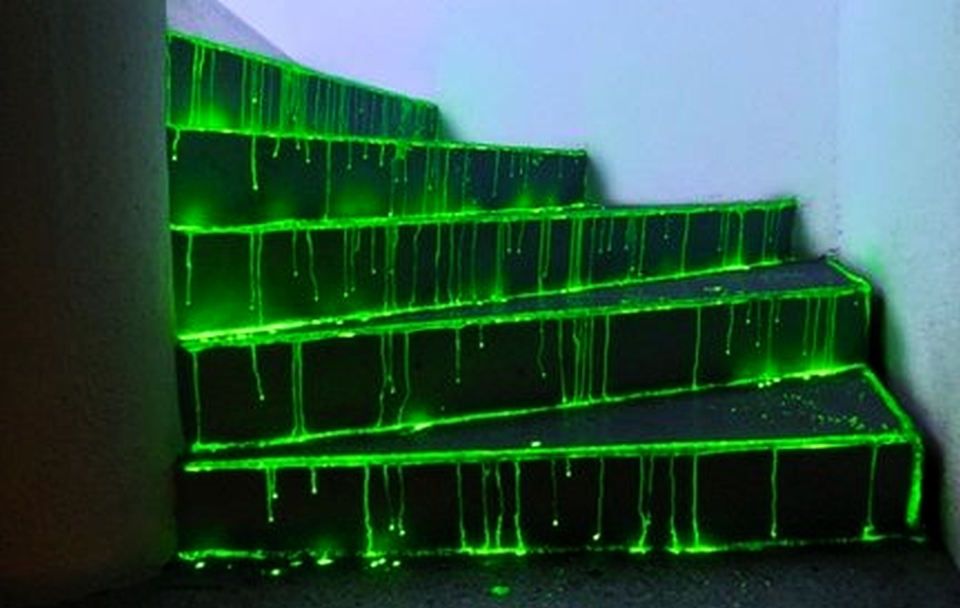
A mixture of powdered laundry detergent (containing phosphors) with water is enough to make your stairs glow in the dark. Just spread the mixture all over your staircase and then watch it glow with black lights. Whoa! Climb the stairs at your own risk, once you’ve done this.
Paper Bat Swarm
Paper Bat Swarm is easy to make. You’ll need black craft paper, scissors, and double-sided tape. Draw flying bats on paper and then cut the shapes out. Make as many as you want and attach them to walls or ceiling with the tape.

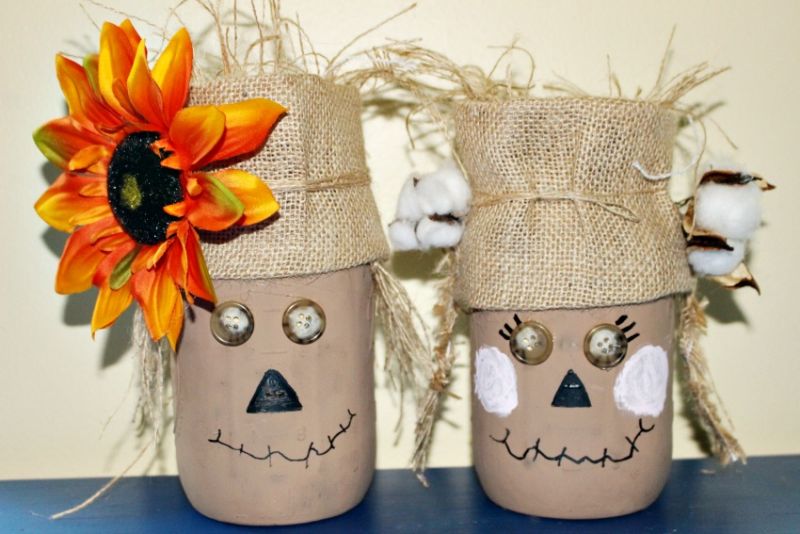
Mason Jar Scarecrow
Mason jars can be used in many different ways for Halloween decoration. A cool idea is to present mason jars as scarecrows. Paint them, add googly eyes, and decorate with burlap.
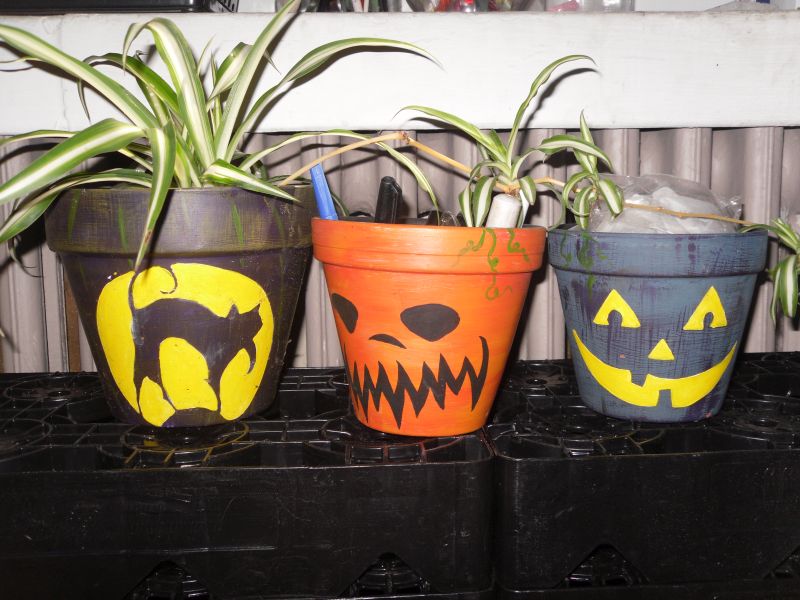
Flower Pot Halloween Decoration
Flower pots can be turned into monsters and Jack-o’-lanterns. Just paint the desired faces on them and have them stationed gloriously on the porch. You can even stick paper cut-outs to mark faces. These creepy flower pots are simple and can be prepared easily.
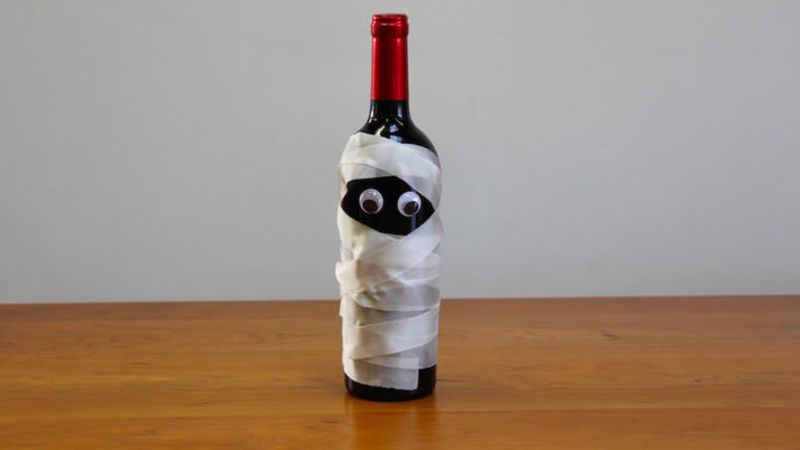
Wine Bottle Mummy
If you don’t have much time to create a table centerpiece for Halloween, you can make one quickly using a wine bottle. This wine bottle mummy is super easy to make. Just wrap the bottle with a white ribbon and add two googly eyes to complete the horrifying frightful look.
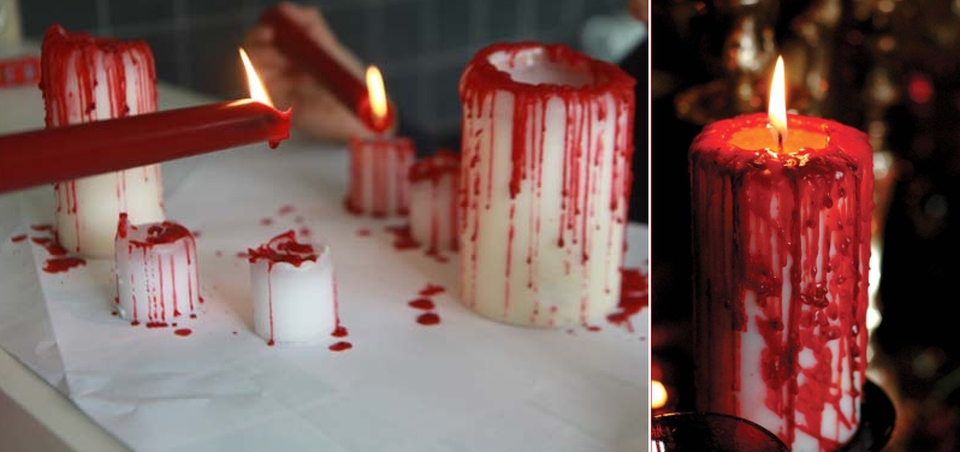
Bloody Candles
Pour drops of red wax on a white candle and the bloody candle is ready to haunt your guests. It will make these candles appear as if bleeding in pain.
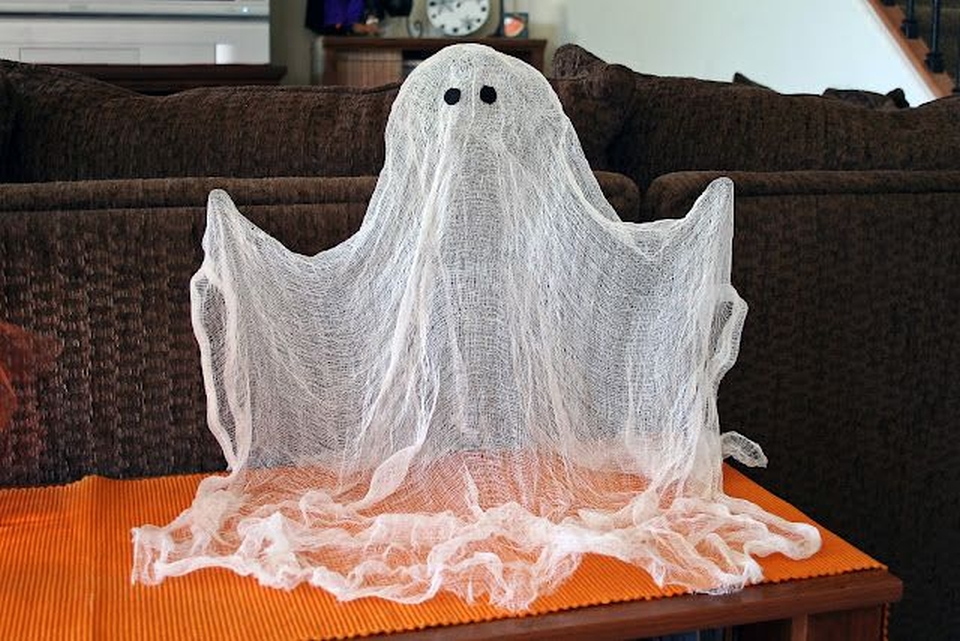
Floating Ghost
Using a thin muslin cloth you can create a scary floating ghost decoration for your home. You need to add two black eyes and make it float using a thread. Lights will further intensify the ghoulish effect.
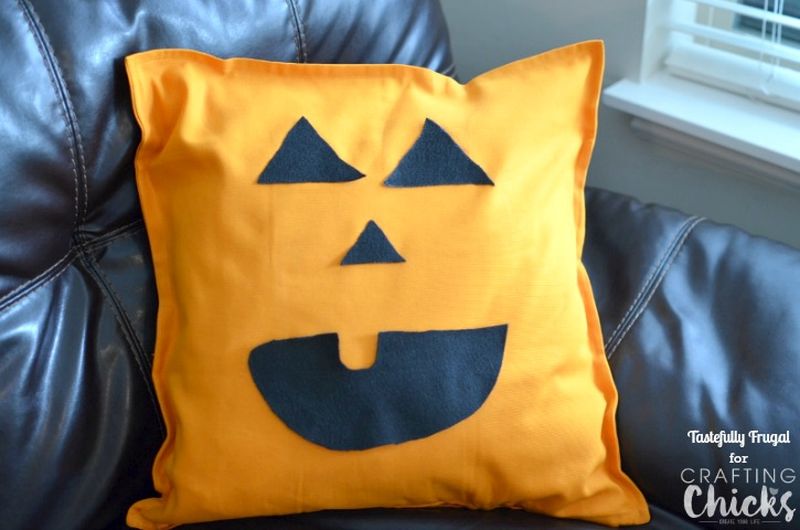
No-Sew Jack-o’-lantern Pillow
Cut out shapes or wordings from black felt and paste to make the Jack-o’-lantern pillow. Sticking them on a plain pillow cover will ensure a scary look. These no-sew pillows provide you with a quick and spooky way to decorate the home.
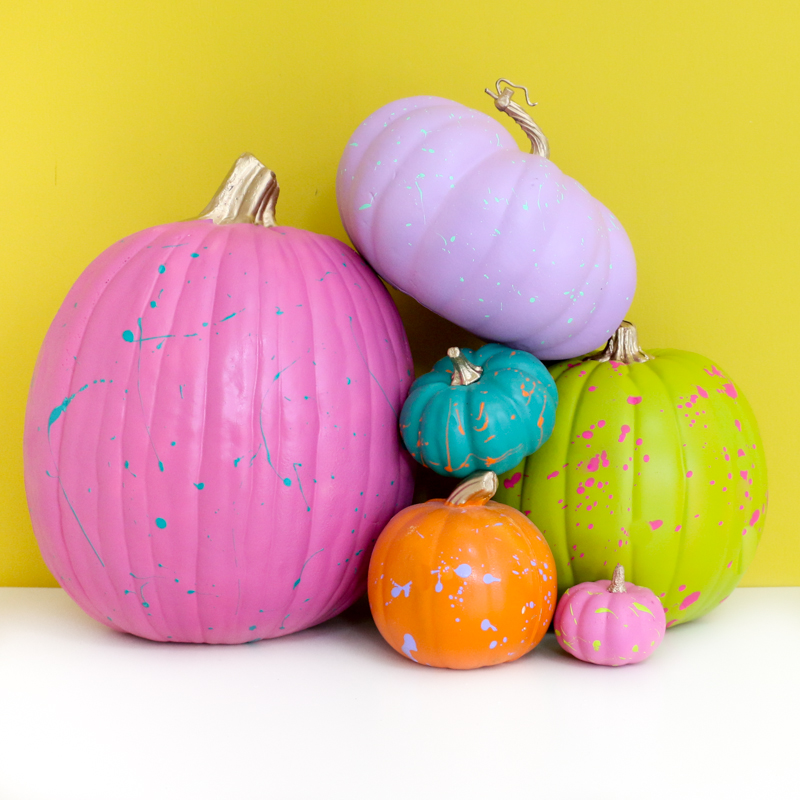
Painted Pumpkin
If you are short of time but want simple yet impressive Halloween decorations, we suggest you go for painted pumpkins. There is a mess that’s associated with pumpkin carving, and to avoid that, you just need to paint pumpkins in the desired color or make creative designs on them. It is the newest Halloween trend becoming popular for its convenience and safety. Here are a few other creative pumpkin painting ideas for inspiration.
Sock Halloween Pumpkin
Looking for easy no-carve pumpkin decorations? The pumpkin made of socks can be a great idea. You can also use paper, wood, and balloons. There are many other ways to make Halloween pumpkin decorations.

DIY Yarn Pumpkin Garland
Don’t want to decorate with real pumpkins? Well, make DIY pumpkins out of old yarn, attach them to form a garland, and have them hanging over your fireplace. Make sure the yarn is orange to resemble the real pumpkins.

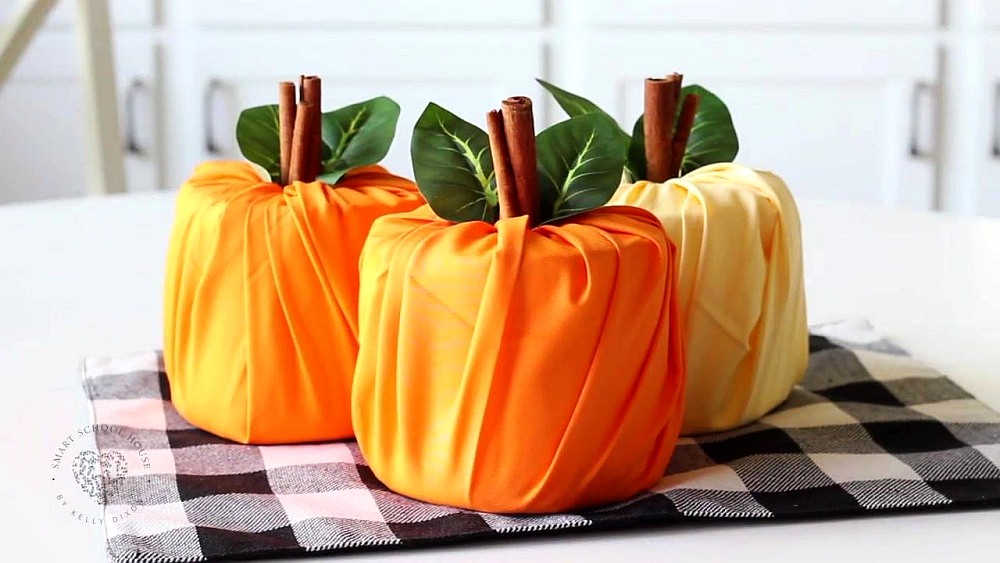
Toilet Paper Roll Pumpkin
This is an easy Halloween craft you can prepare in minutes. You just need toilet paper rolls, pieces of fabric, and a few other basic supplies. Wrap up the toilet roll with fabric in a way that it looks like a pumpkin and finally decorate with fake leaves and wood sticks. There is no need for gluing, sewing, or other hard crafting.
Succulent Monogram Pumpkin
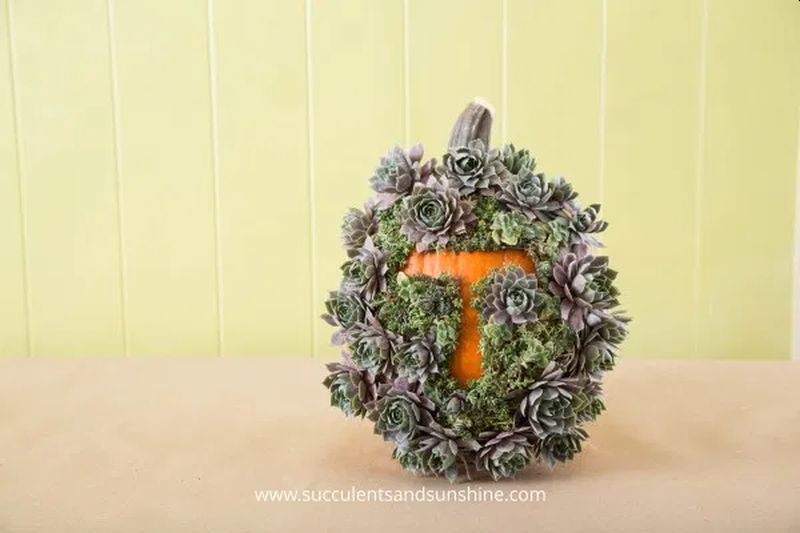
If you want to make some festive and cheerful decorations for Halloween, this succulent monogram pumpkin may be a good option for you. Just paste the succulent cuttings all around the letter using the hot glue gun. Tada!
Hula Hoop Halloween Wreath
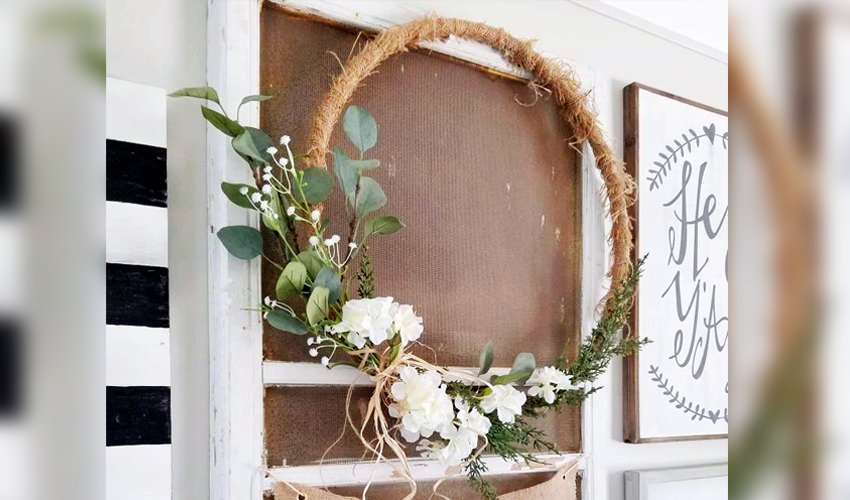
This Halloween wreath can be made easily by wrapping a hula hoop with burlap. You can use any round item. Next, you need to decorate the wreath with green leaves and flowers. It will look stunning on the front door.
Halloween Window Silhouettes
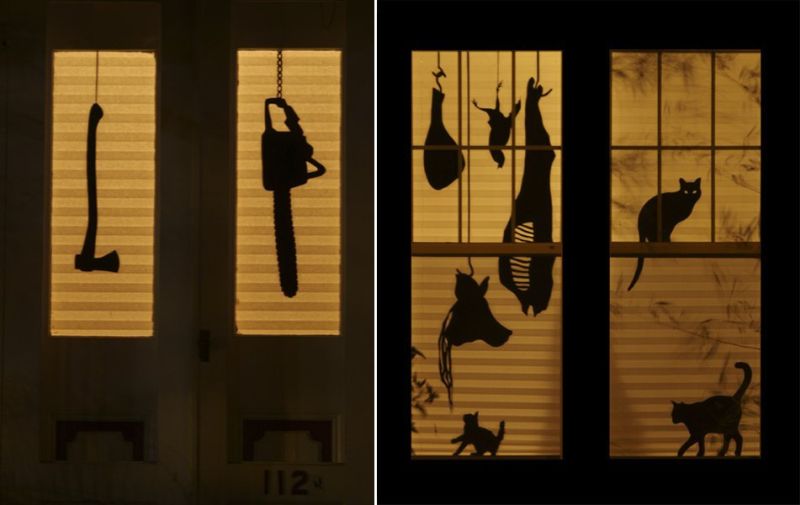
If you have skills in paper crafting, you can easily create figures like knives, zombies, witches etc., and stick them on your window with tape. Decorating windows with paper silhouettes is a cool way to impress your guests and neighbors on Halloween, while simultaneously giving them a scare.
Mummy Wreath
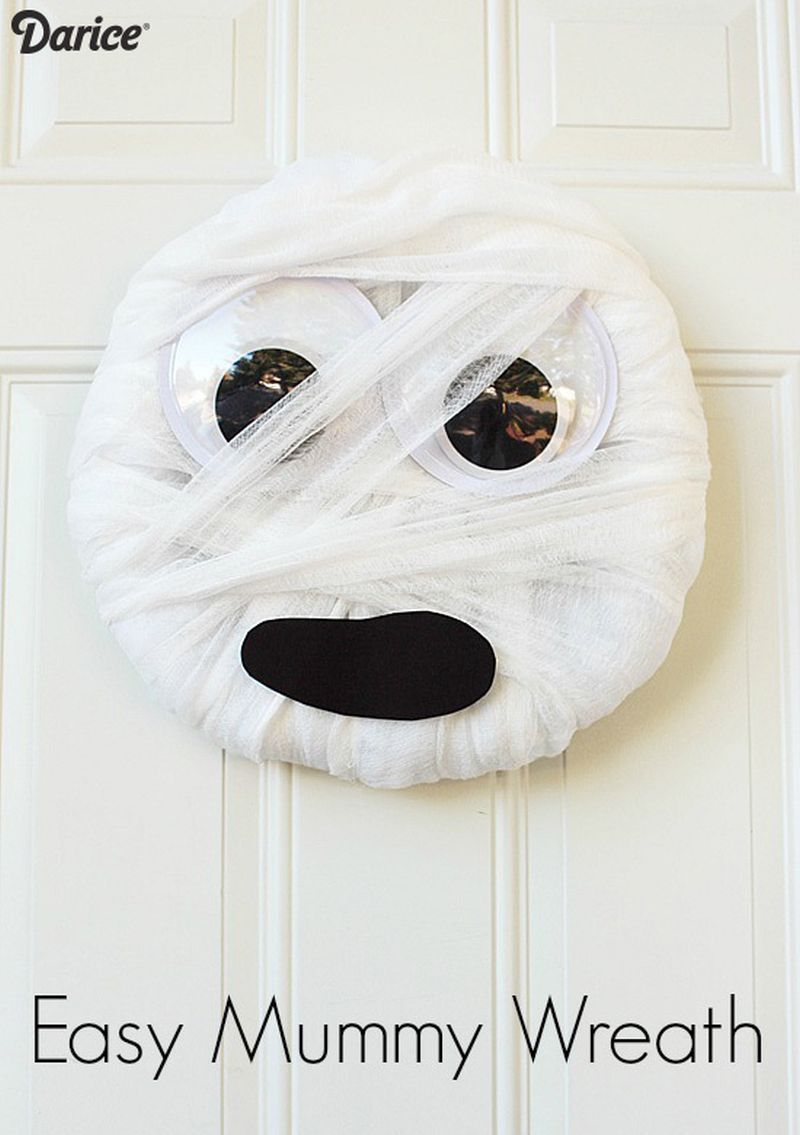
Take an old metal wreath form and wrap it around with cheesecloth. Add two googly eyes and it is ready to hang on your front door. You can cut out a mouth for the mummy wreath from black felt or paper.
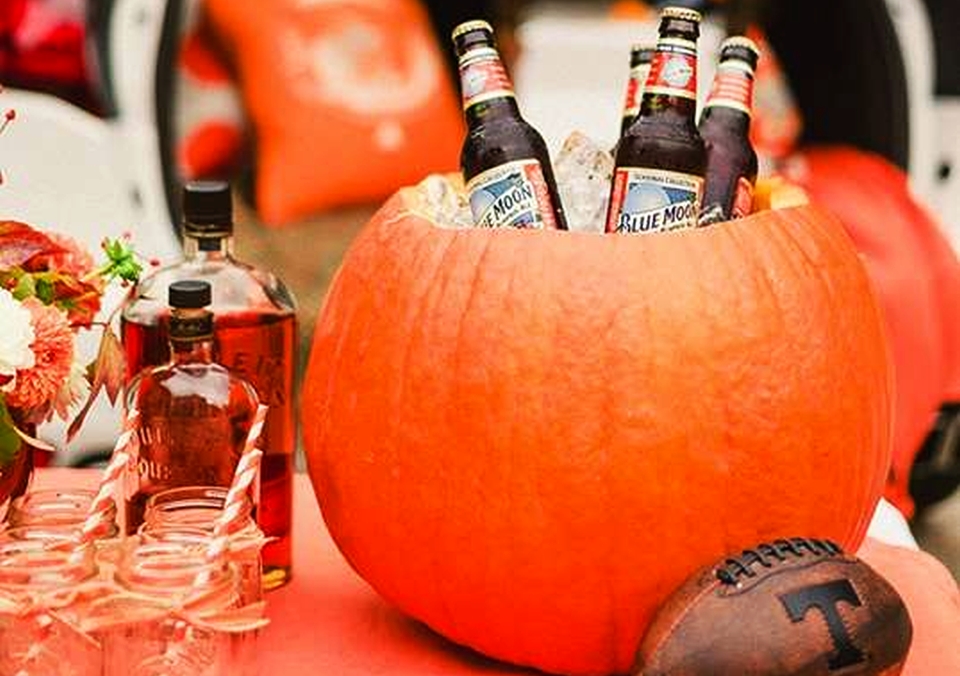
Pumpkin Cooler
Another cool way to celebrate while maintaining the Halloween frenzy is to turn a pumpkin into a beverage cooler. This way it will serve your guests with chilled drinks and also double as elegant Halloween decor.
Also Read: 30 Quick and Easy DIY Halloween Crafts
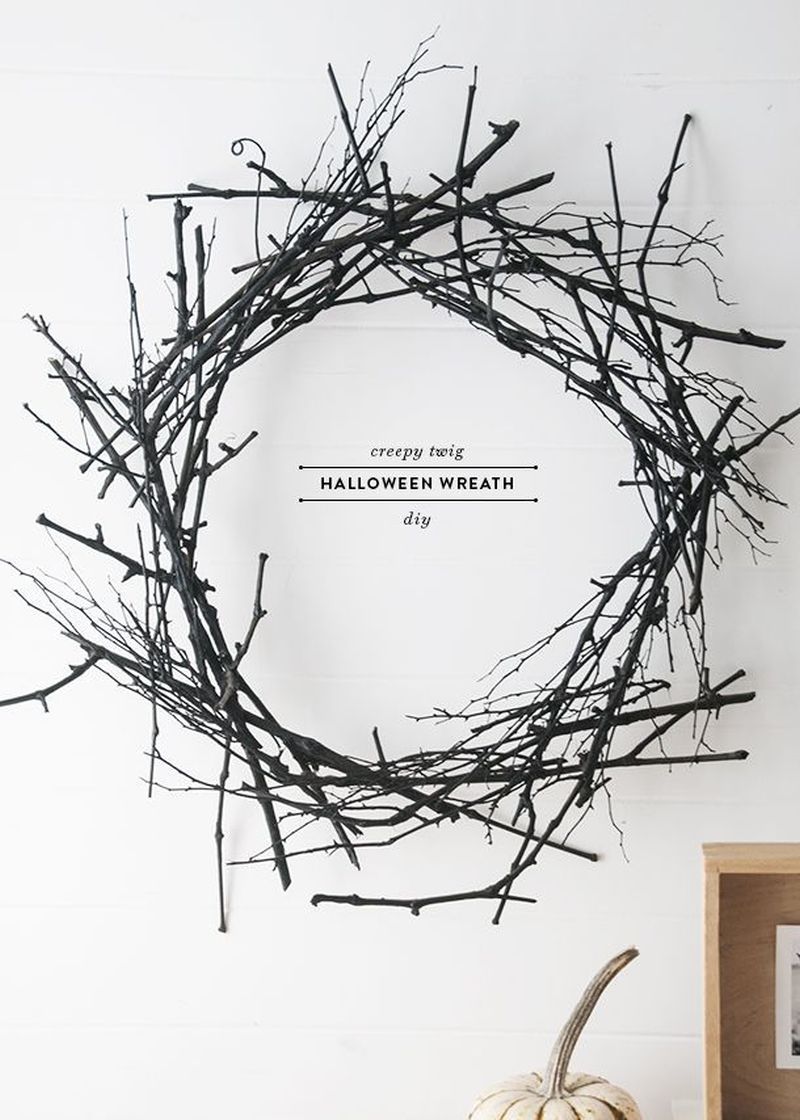
Spooky Twig Wreath
A few twigs and thin branches you have collected from around your house can easily be used to make a spooky Halloween wreath. You just need to glue up the twigs in a pattern of choice. The twigs can even be painted for a colorful look.
Bats on Branches
Gather some twigs, slightly long in size, and arrange them in a vase half full with foam. Stick some paper bat cutouts randomly on these twigs, that resemble branches of a tree, and your decoration is perfectly done.

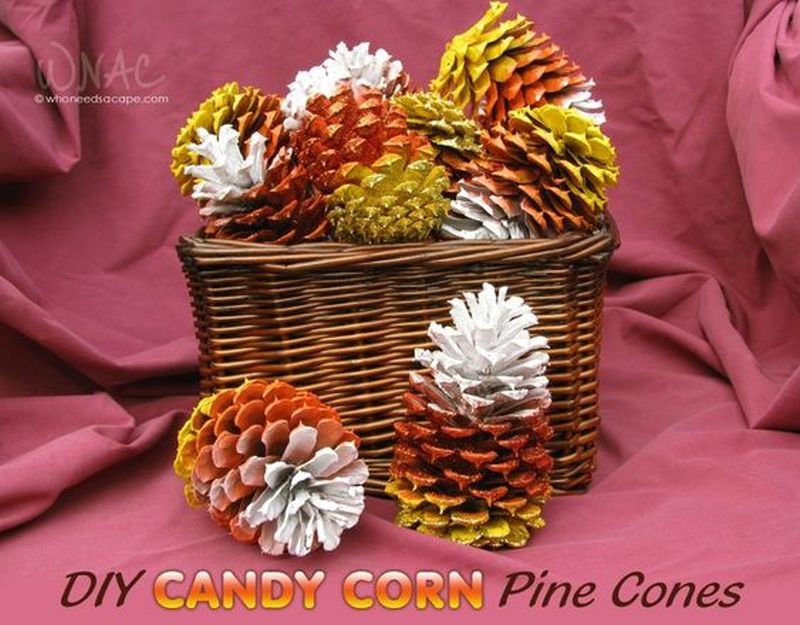
Candy Corn Pine Cones
Collecting pine cones and then turning these natural items into beautiful Halloween decorations is surely a great activity. You can turn them into candy corn decorations easily by spray painting them in three different colors.
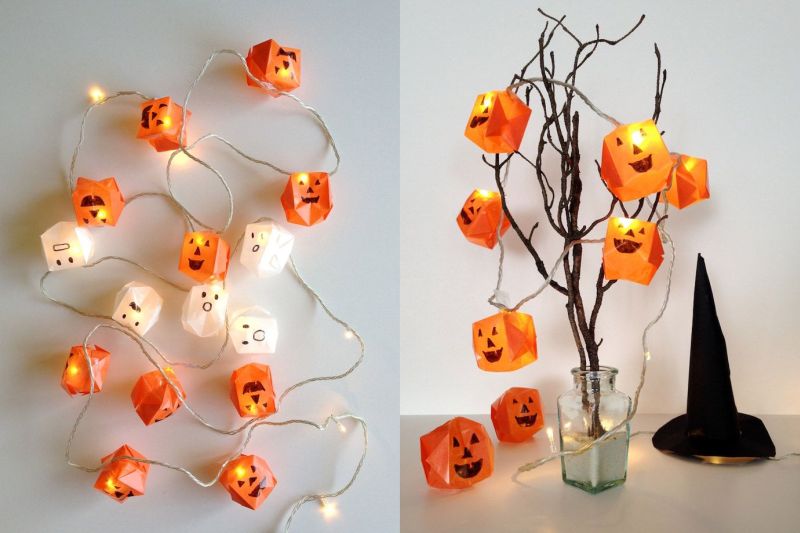
Origami Halloween Lights
This one is really easy to craft. Fold a simple origami balloon, draw scary faces on it, and repeat the process. Then, attach the balloons to the light strings with tape. Voila! You’ve got a perfectly spooky string of lights ready for Halloween.
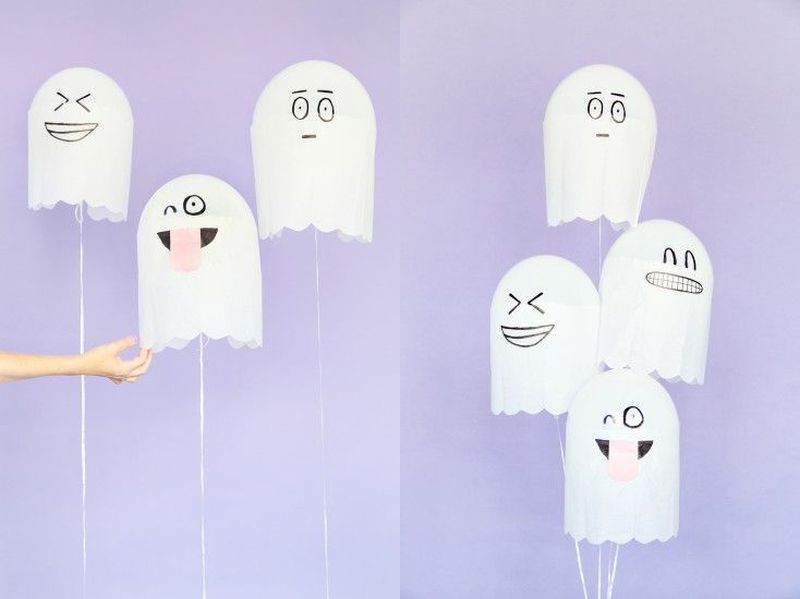
Silly Ghost Balloons
Inflate balloons with helium, tie them with ribbon, and draw silly expressions on them with a black marker. Wrap sheets of tissue paper on each balloon, with scalloped edges on the bottom. These silly ghost balloons are perfect to greet your guests.
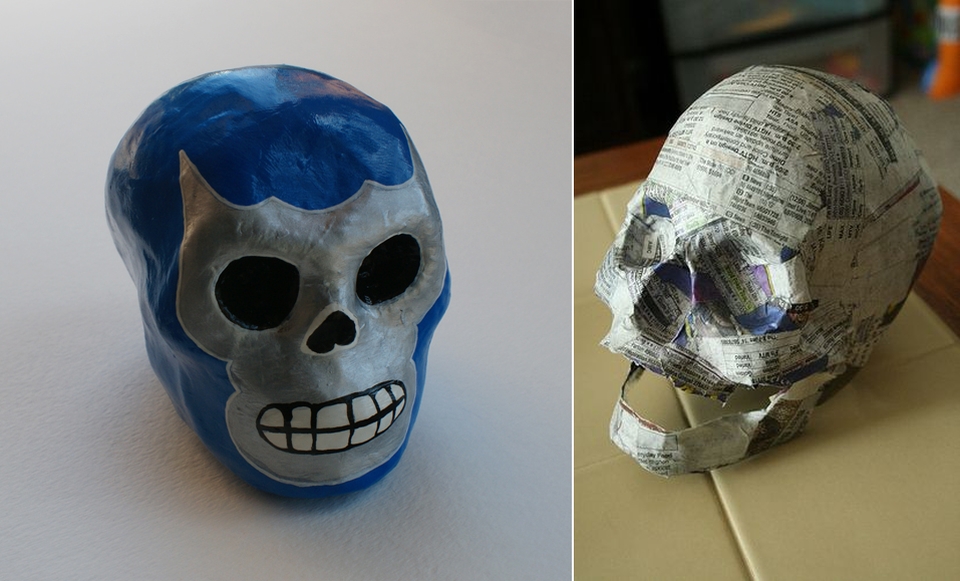
Paper Skull
If you have an artistic nerve, you can try making skulls out of paper or old cardboard. These skulls can even be painted for a swanky touch. Find a tutorial to make spooky paper skulls at Spookyblue.
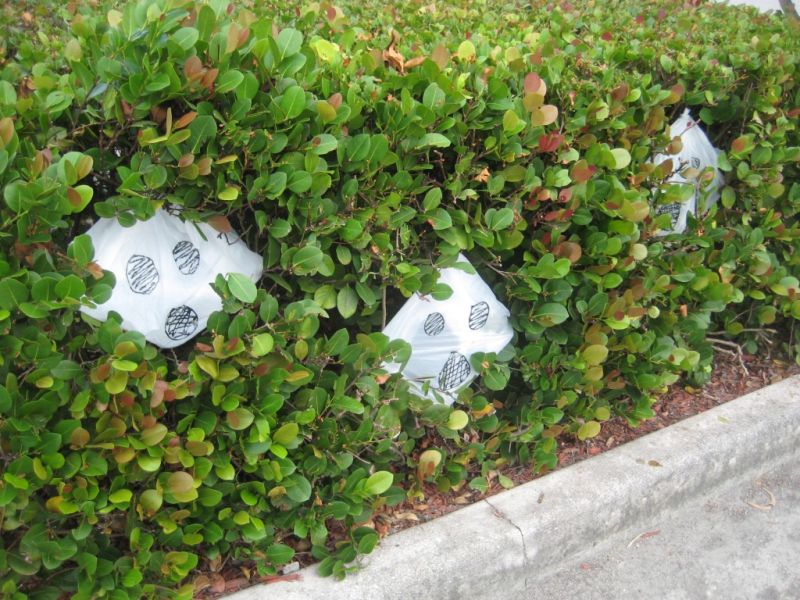
Yard Ghosts from Plastic Bag
Spook up your yard with hanging ghosts made of plastic bags and cloth hangers. Just wrap up plastic around the hanger, draw a spooky face on it and it is ready. You can put these ghost decorations in the bushes in your garden or hang them on trees.
Lolly Stick Crafts
This is the easiest Halloween DIY that you can try this holiday season. All you require is a bunch of lolly sticks, glue, and paint of your choice. Glue the sticks together, paint the scary faces on them and let the paint dry. Once the paint is completely dried, it is ready to scare the visitors.

Mason Jar Mummy DIY
This Halloween mason jar mummy DIY will take you minutes to complete. You will require mason jars, googly eyes, white gauze, scissors, and votive candles. First, use white gauze to wrap each jar multiple times and secure the gauze with glue. Now, glue different-sized googly eyes on each jar to make them look frightening enough. For the final touch, place votive candles inside to light up your Halloween scene.

Painted Rocks for Halloween
Painted rocks can make a great addition to Halloween. Gather as many rocks as you can, paint, pencil, and clear spray sealer. Begin by painting the Halloween doodle of your choice on each rock – it could be a ghost or bat. Then paint your doodle in any color of your choosing, spray the rocks with a sealer, and ta-da! Your adorably uncanny rocks are ready.

Spider Sack
This fun and uncomplicated Halloween DIY will enhance your decoration. The basic thing you need to do is wrap a glue-soaked yarn around a balloon and set it aside for drying. Once your yarn is completely dried, just pop the balloon with a needle and take it out. Now it’s time to decorate with the spiders and hang them.

Boo Garland
Adorn your walls or mantel for the holidays with this Boo garland. All you need to do is attach three vintage papers on three sheets of black construction paper. Then trace the letters on each paper using marker and stencil. Next, fill them with a black sketch pen, punch holes in the top of each paper, and pass a long thread through the holes. And done, you are ready for the Halloween.

Aluminum Foil Spiders
Give your house a ghostly touch with these cute critters crawling around. Begin by making a basic ball of foil and cut little stripes from cardstock paper for legs. Attach the legs and googly eyes with glue and let it dry. This DIY will perfectly decorate your house for Halloween.

Ghost in a Jar
Super cheap and super simple, this ghost in a jar DIY will take you less than 15 minutes. Start with gathering supplies such as Styrofoam, Mason jar, twigs, moss, scissors, glue gun, and more. Make some Styrofoam circle cut-outs and glue them to the underside of the lid. It is time to stick your stick into the Styrofoam and make a ghost from gauze paper. Wrap your ghost around the Styrofoam balls and draw eyes with a sharpie. Now stick your ghost onto one of the branches, add moss, and screw the jar onto the lid upside down.

Witch Paper Garland
Set your mood for Halloween with this easy-to-make witch paper garland. Just grab a stencil and cut witch silhouette from black paper. Next, you need to cut a spooky-looking witch house and string everything along onto a thread. Now for the final step, all you need to do is find an ideal spot in your house to hang this DIY Halloween garland.

DIY Jack-o’-lantern Garland
Pumpkins and Halloween go hand-in-hand. While carving pumpkins is tough, making pumpkin garlands is easy and cheap. For this DIY you need two sheets of foam paper, hot glue, a craft knife, jute yarn, a black marker, and hand-drawn Jack-o’-lantern templates. Cut adorable pumpkins out of the foam sheets using the stencil, draw terrifying faces on them with a black marker, and glue them onto the jute yarn. And your DIY Jack-o’-lantern is all set to enliven your walls.

DIY Sheet Ghost Decoration
Give your Halloween decoration a goosebump-worthy look with this eerie sheet ghost decoration. It is simple and effective, all you need is a plain white cloth, a straight or somewhat straight stick, string lights, black paper, foam ball, and floral foam. First, stick the foam ball on the stick, wrap the string lights around the stick, and secure it into the floral foam. Next, drape the cloth over your set-up and make sure the cloth covers everything. Now, cut out the eyes and attach them to your ghost. And ta-da, your DIY sheet ghost is ready to embrace your house with some festive cheers.

Floating Ghost for Halloween
Try this quick floating ghost DIY, which will take you less than a minute to make. All you need are foam balls, a white cloth, hot glue, scissors, black paper, a needle, and some twine. Commence by cutting cloth in a rectangular shape, then use a long piece of thread to pierce the foam ball and cloth through the center. At last, cut oval eyes from black paper and glue them on your ghost. That’s it, you can hang them out on your front porch for the menacing element.

Ghost Garland DIY
This ghost garland Halloween DIY is inexpensive and done in a jiffy. You will require cheesecloth, cotton, black paint, scissors, and twine. Cut a bunch of tiny rectangles out of cheesecloth and make cotton balls. Find the center and stuff cotton balls there while securing them with the twine. Make more of these ghosts and paint eyes and mouths with black paint. Once you are done, take a long twine and tie them all around it, making sure they are facing forward. That’s it, you are all set to bring your wall to life this Halloween.

Bat Wreath With Twigs
Making this easy DIY bat wreath with twigs is so much fun. You will need some twigs for this, black paper bats, black spray paint, and a hot glue gun. Simply start by layering twigs in an abstract manner that mirrors a circle and glue them together. Once your twigs are secured, you can paint them black for a gothic effect. Glue paper bats on your wreath and hang it wherever you please.

Black Feather Wreath
Don’t have time to make something extravagant? Not to worry, this quick and laidback feather wreath is here to save the day. You only need four things to make this enchanting wreath – cardboard, feather lace, string lights, and hot glue. Begin by cutting a base out of old cardboard and gluing the feather lace around the ring for a chic look. Lastly, adorn the wreath with string lights and let it entice the guests and bewitch your walls, entrance, and front door.

DIY Pink bat Wreath
Invite some haunting cheer to your home this spooky season with this simple, cheap, and uncomplicated bat wreath. You can easily make this using pink-colored felt sheets and bat templates. Just trace the bat template of different sizes on pink felt sheets and cut the bats. For the final step, take the ring wreath base and glue your bats onto the ring. All done, your adorable DIY bat wreath is ready to uplift your Halloween decoration. Follow this tutorial and create a bat wreath for less than $10.

With these fun creations, you can instantly get into the spooky spirit. These easy crafts will surely save your day and be the best decorations just in time for Halloween.
Follow Homecrux on Google News!

